Testing In Visual Studio Part 3
Background
This is part three in my series on Testing In Visual Studio. Having worked with testing in other environments for some years now I really wanted to dive deep into the Visual Studio way of testing. In Testing In Visual Studio Part 1 we took a good look at static code analysis, unit testing and code coverage. In Testing In Visual Studio Part 2 we looked at coded user interface tests and also data-driven coded user interface tests.
Today we will take a closer look at Continuous Integration in Visual Studio - or rather Team Foundation Server (that can interface to Visual Studio) - and discover some really awesome features that will help your agile team produce better quality while having more fun.
What is Continuous Integration?
Before we look at how Visual Studio and Team Foundation Server deals with continuous integration we need to understand a bit more about the concept of continuous integration.
The short explanation
Continuous integration is a practice to - in an automated way - compile, run tests and provide feedback on every code change.
The long explanation
In the extreme programming community circa 1999-2000 Martin Fowler and Kent Beck proposed the concept of continuous integration. On his homepage (see [1]) Martin Fowler summarizes the concept as:
Continuous Integration is a software development practice where members of a team integrate their work frequently, usually each person integrates at least daily - leading to multiple integrations per day. Each integration is verified by an automated build (including test) to detect integration errors as quickly as possible. Many teams find that this approach leads to significantly reduced integration problems and allows a team to develop cohesive software more rapidly...
See also Wikipedia: [2]
What is Team Foundation Server?
Team Foundation Server is a server solution for developers in Microsoft environments including source code control and build service. Wikipedia summarizes Team Foundation Server in [3] as
Team Foundation Server (commonly abbreviated to TFS) is a Microsoft product offering source control, data collection, reporting, and project tracking, and is intended for collaborative software development projects. It is available either as stand-alone software, or as the server side back end platform for Visual Studio Team System (VSTS)...
Installing Team Foundation Server
Since I only have an old Windows Vista sacrifice system I cannot get the latest Team Foundation Server (but the Team Foundation Server 2012 Express edition looks really interesting [4]).
I am installing this on the same system as I a developing and I guess that is not the intended use case - I assume installing it on a dedicated server is a much better solution.
I select the advanced wizard during my installation:

Connecting Visual Studio to Team Foundation Server and adding code
Once the install finished I open up Visual Studio and connect to Team Foundation Server using the button in the top left on the start page.
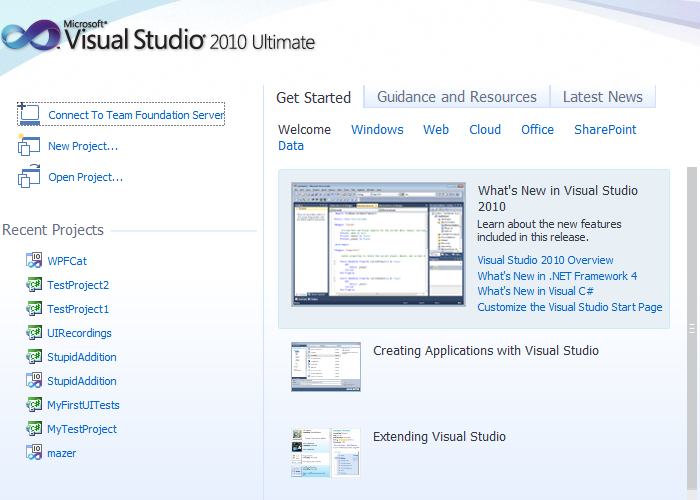
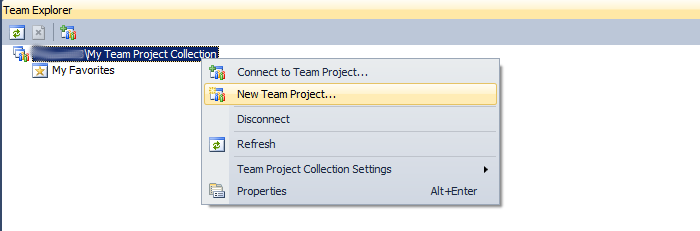
There is now, of course, a Team Explorer view in Visual Studio - and I use it to add a new team project.
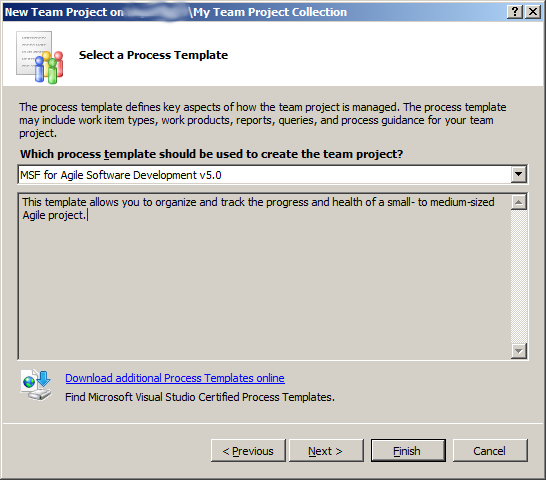
I follow the appearing wizard and select the Agile Template.
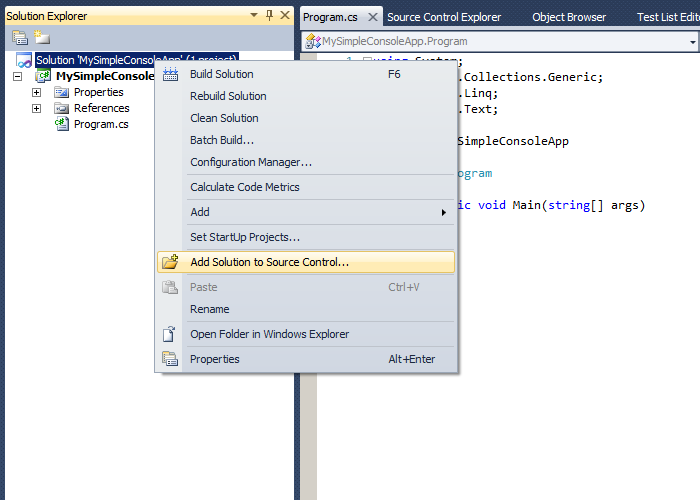
Once that is finished I add my solution to Source Control using the typical (and probably patented) Visual Studio Right Click of the Mouse on the solution and select Add Solution to Source Control...
Upon check-in there is a user-friendly little window appearing asking you to comment on this commit. It also shows you the files you are about to check-in.

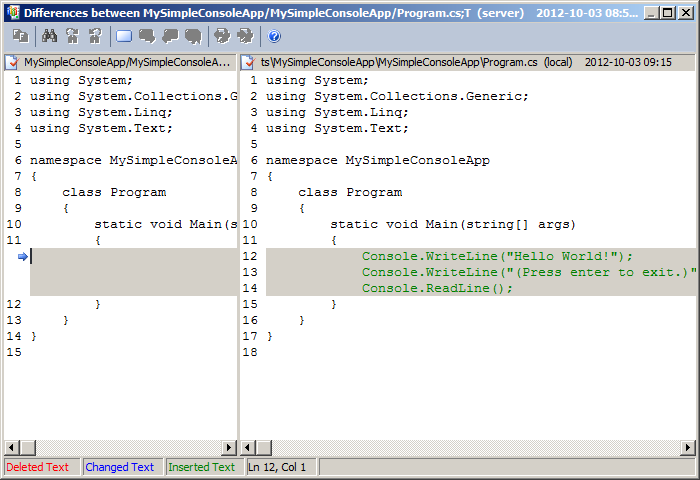
Once you get the hang of it a good idea is to always check the differences you are about to check in before checking them in. Right click -> Compare on the item of interest. If you have never seen this diff view before it is about time you saw it now. There are a number of visual diff's out there but the original terminal based ones are still awesome. According to Wikipedia the first diff was written in the early 1970's (see [5]). Any way - this is what a diff in Visual Studio looks like:
Making a build
Build Configuration
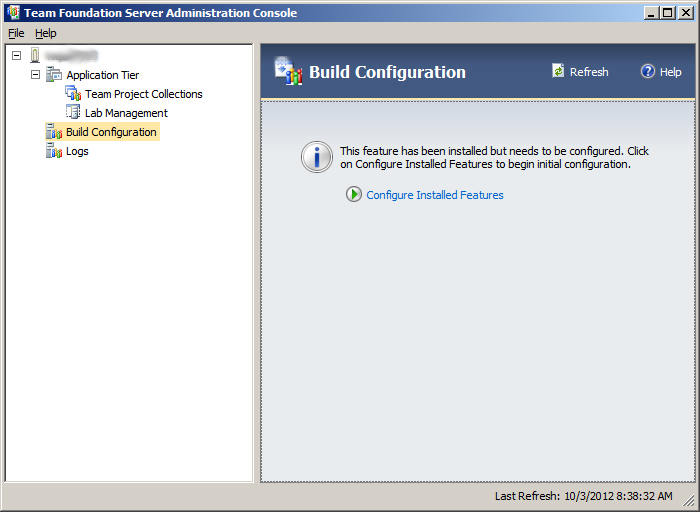
First you need to configure Team Foundation Server to have a Build Service by following a configuration wizard. I had already installed the ability to perform builds - but not configured it properly:
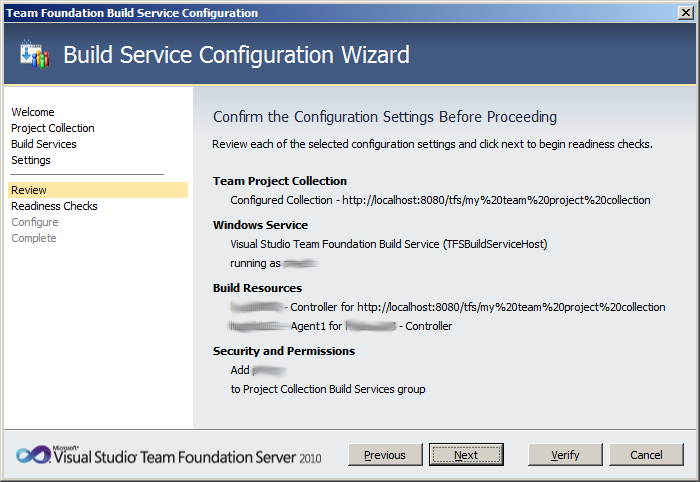
Here is what my configuration looked like just before finishing the configuration wizard.
Adding a build
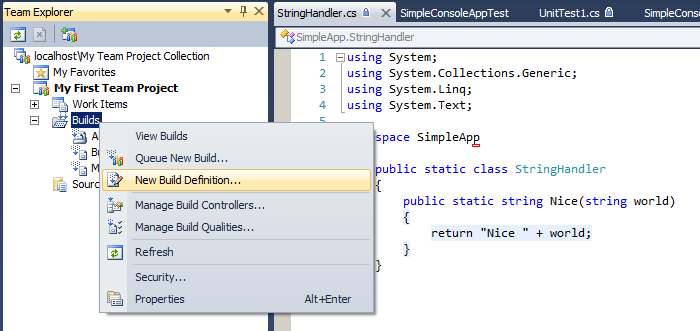
Adding a build is done with the typical right click in the right place - in this case in the Team Explorer view:
Configuring this build can be a real pain in the neck - there are a number of pitfalls. I'll try to walk you through them.
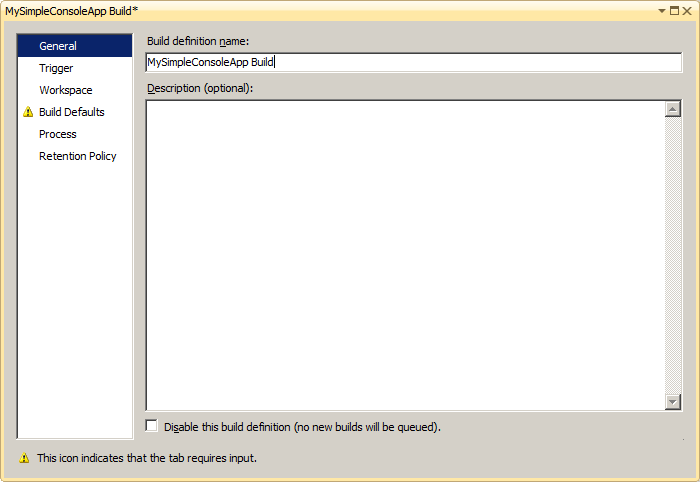
In the General "tab" I just gave my build a unique name:
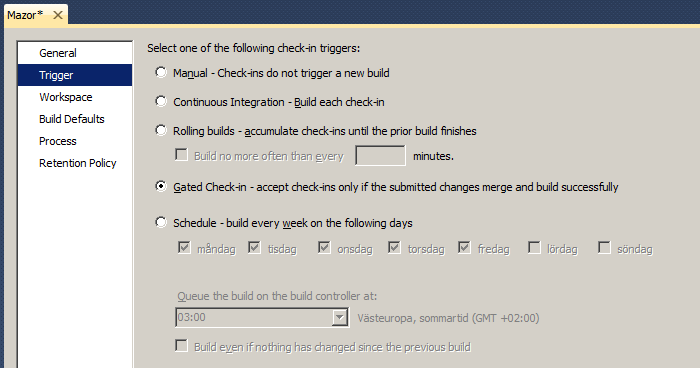
The first really interesting part is under the Trigger "tab". Here you can select continuous integration (or Gated Check-in). Just this feature can be the reason for throwing away what ever build system you have and using Visual Studio + Team Foundation Server instead. This is awesome!

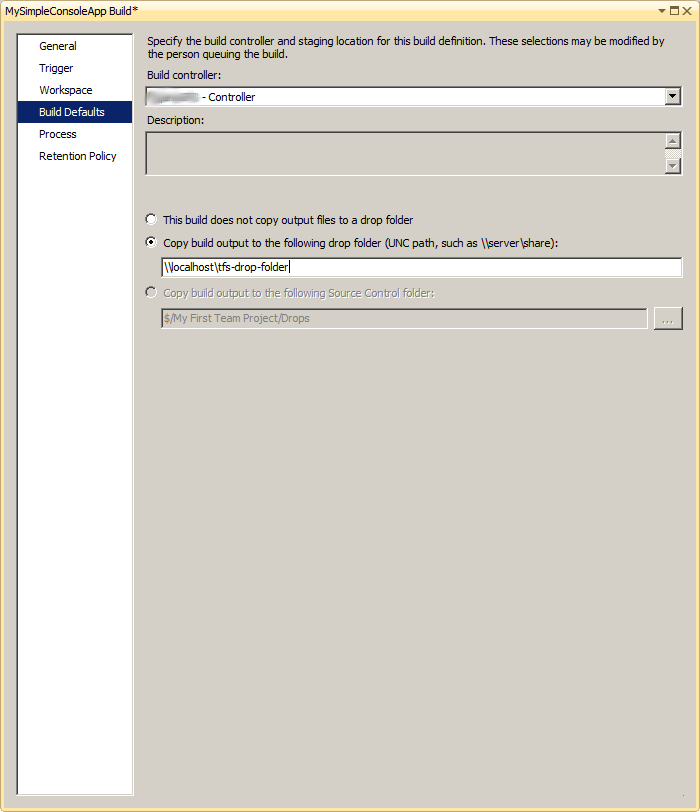
Under Build Defaults you should add a drop folder as a shared on some server - in my case C:\tfs-drop-folder. (I of course had to make this folder shared by doing the magic right click on it while browsing my files and folders.)
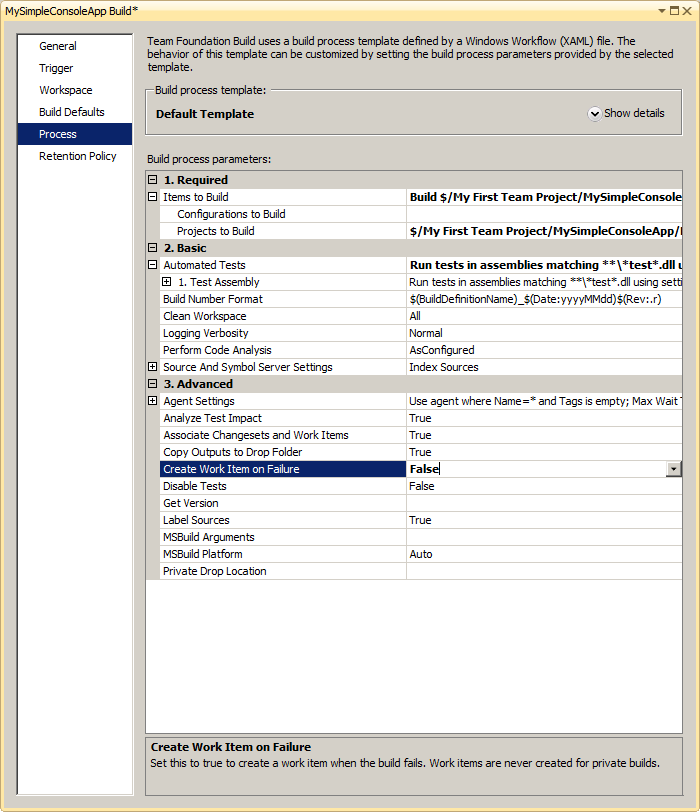
A good practice is to force your developers (and yourself) to take action if anyone checks in code (or tests) that break the build or if tests fail. Do this by setting "Create Work Item on Failure" to False.
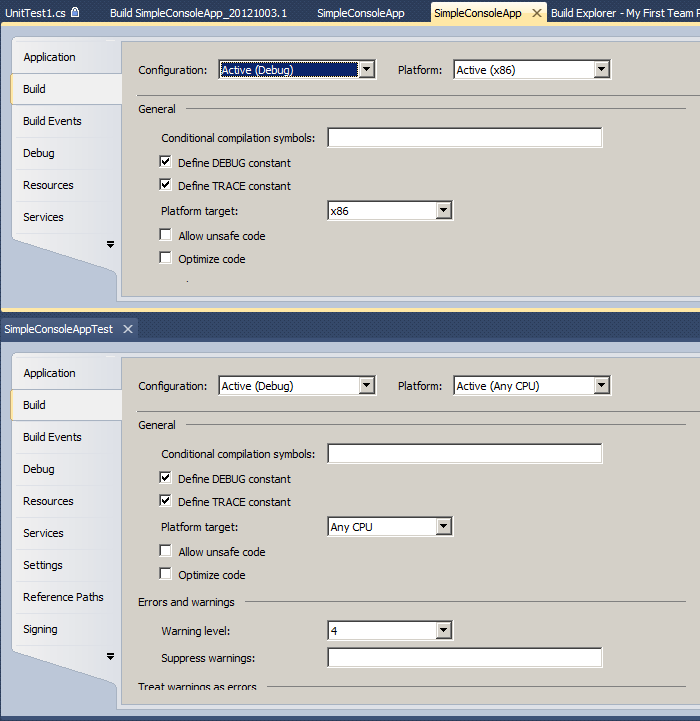
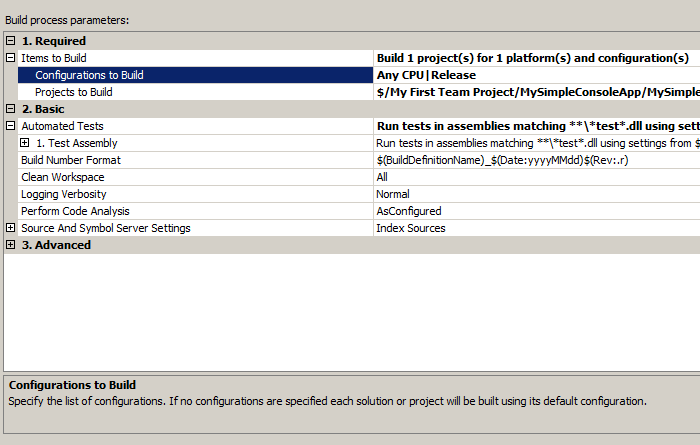
A problem I had that I found easier to dodge than to solve was the case where my test project and my application had different platforms - in my case x86 vs Any CPU. This caused the build to break since it was somehow unable to build both the tests and the executable at the same time. The workaround was to use a better architecture in my solution and projects: I separated a lot of the code to libraries (dll's) instead and wrote tests to target them. And then I wrote a kind of a front-end on top of the libraries. This did not solve my problem with Team Foundation Server but it was good enough for today. Here is what to look out for if you get a similar problem:
To change the configurations to build you have the possibility to do so under 1. Required -> Items to Build -> Configurations to Build. I believe you might need to add at least one configuration here - something like Any CPU|Release - like I did.
Automatic Code Coverage in the build report
The next problem I had (and a loot of you people out there) was that I did not get any Code Coverage in the build. The problem was that I bad to both activate Code Coverage and then select what build items to analyze.
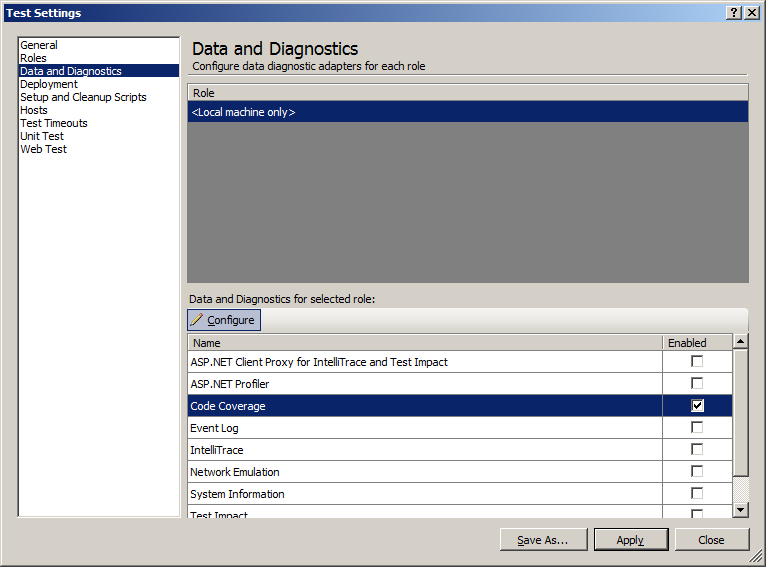
I did this in four steps. First I double clicked Local.testsettings under Solution Items in the Solution Explorer to get the Test Settings window to appear. Second I activated code coverage under the Data and Diagnostics tab. As you can see in this screen shot there is also a button called Configure in the middle of the screen that is activated once Code Coverage is selected.
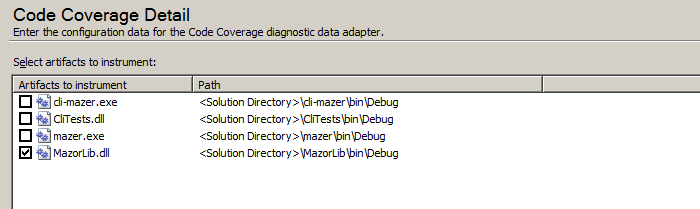
Third: once I clicked the Configure button I select the libraries to do code coverage analysis on. I ignore the front ends and the tests.
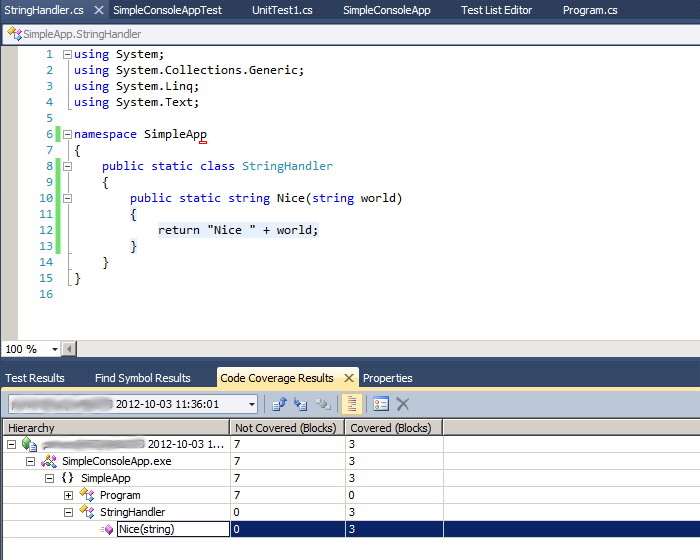
Once that is done and I have a build I verify that the code coverage looks ok by inspecting some random source code file:
We have Continuous Integration!
Now you should have a situation where every code check-in triggers a build, some test runs and code coverage analysis. In my case I would get something like this:

The next step: Gated check-ins
You should activate the gated check-in feature by the magi right-click on the build and selecting trigger -> Gated Check-in.
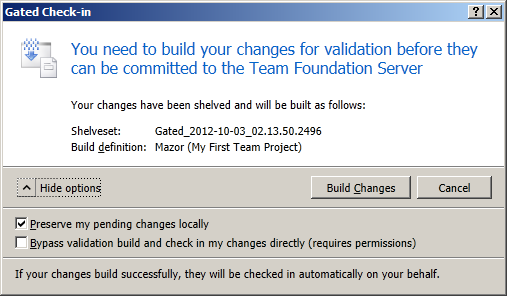
Now on each commit Visual Studio will let you know that You need to build your changes for validation before they can be committed to the Team Foundation Server. Your changes will also be put on a shelf - they are "shelved" (I guess the git-speak term stashed was not professional enough for Microsoft). This is the alert you will get on each check-in now:
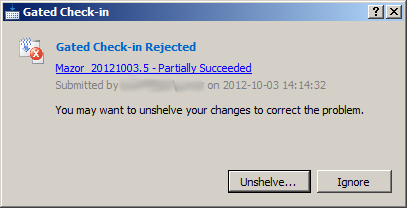
And what I did next was to deliberately break the build by making a test fail at all times. Once the build had finished I was informed: Gated Check-in Rejected. Also: You may want to unshelve your changes to correct the problem.
Summary
Today I tried setting up an instance of Team Foundation Server in order to try out Continuous Integration and Continuous Integration with Gated Check-Ins. This took me less than a work day on an old laptop running an old version of Windows OS, but I did some research yesterday:
- I took a look at a clip on youtube called Build Automation and Continuous Integration with TFS 2010SVNUG Presentation #9 (October 2011) where Scott Hembrough demonstrates Microsoft Team Foundation Server 2010 - see youtube at [6]
- I read up on MSDN Build and Deploy Continuously at MSDN: [7]
- I glanced at Getting Started with Visual Studio Application Lifecycle Management, again at MSDN: [8]
In short what we did was:
- Install Visual Studio (already done)
- Install Team Foundation Server and configure it
- Hook up Visual Studio to Team Foundation Server
- Configure a build service
- Add some existing projects to Team Foundation Server
- Creating and configuring builds
- Continuous Integration does a build and performs tests on check-in
- Gated Check-Ins performs the tests before check-in, in order to verify that your commit is ok.
Belongs in Kategori Programmering
Belongs in Kategori Test
See also Testing In Visual Studio
See also Testing In Visual Studio Part 1 where we look at Static Code Analysis, Unit Testing and Code Coverage.
See also Testing In Visual Studio Part 2 where we look at coded user interface tests