Testing In Visual Studio Part 2
Introduction
This is part 2 in my little series on Testing In Visual Studio - in Testing In Visual Studio Part 1 we took an in-depth look at Static Code Analysis, Unit Testing and Code Coverage. Today we will take a look at: Coded User Interface Tests also known as Coded UI Tests and Data-Driven Coded User Interface Tests.
Example Application
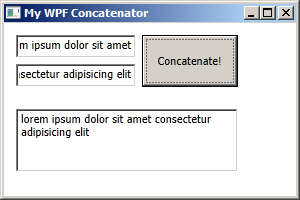
It seems you can not demonstrate User Interface Testing without having some kind of addition - I choose concatenation of text:
- two text boxes with input
- a button
- an output text box where the text appears (with an extra space) upon pressing the button.
In addition to naming and resizing the fields in the XAML-code I added a method for the event when you press the button:
        private void bCat_Click(object sender, RoutedEventArgs e)
        {
            tbOutput.Text = tbInputTop.Text + " " + tbInputSecond.Text;
        }
I could perhaps have used a data binding as in Wpf Data Binding - but this was even more quick and dirty.
Add a Coded UI Test
As per the Visual Studio way we just select Test -> New Test and then add a Coded UI Test:
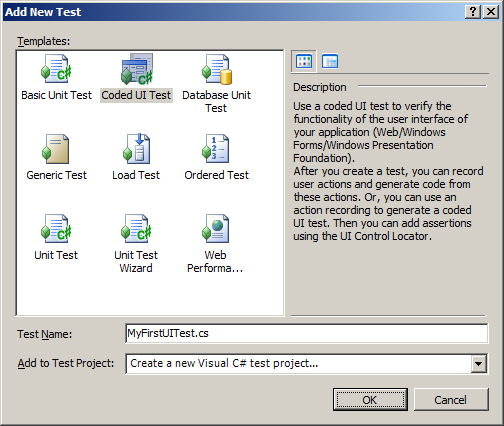
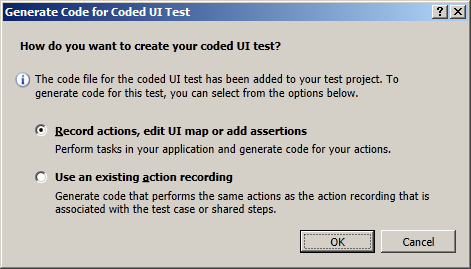
The first time you do this you want to record new actions and assertions from scratch (leave the radio button on top).
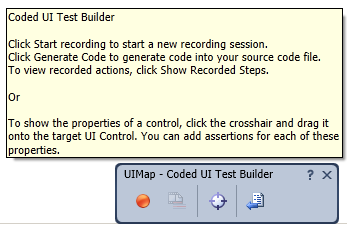
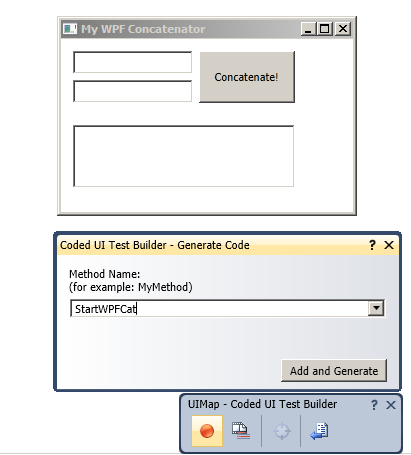
As you can see UIMap - Coded UI Test Builder appears at the bottom right of the screen. To start recording methods press the round button on the left of it to start.
Careful when recording
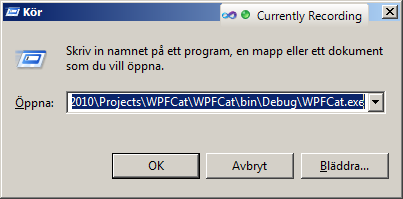
OK, so you are now recording our first Coded UI Test. The first thing you want to do is to start the application of interest. I guess there are many was of doing this - I chose a quick and very dirty way: I pressed the Windows Key + R, to get the Run dialogue to appear (in lovely Swedish in the image below) followed by a hard coded path. This does not smell like best practice - if I keep working with Coded UI Tests I will most certainly take a better look at this step. You can also see the little Visual Studio logo, a colorful circle and the text "Currently Recording" superimposed on the regular User Interface of this dialogue.
Take care to stop regularly, generate code to "save" the state and to get more maintainable code. It is for example wise to have a start or setup method and stop or teardown method.
What you should keep in mind is that there are two kinds of "recordings" to make:
- Record actions to drive the application forward, and
- Assertions on elements and controls of the user interface.
My first Coded UI Test Assert
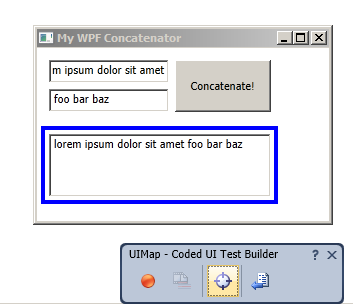
OK, so we should not just click the application to some random state - we want to make sure that these states are correct. We do this by, instead or recording actions, adding assertions. Assertions are added by pressing the left mouse button on the cross hair (without releasing the mouse button) and then moving the cursor to the element of interest. This can only be done once code has been generated. Microsoft's intention is to separate actions from assertions. In my case I hover over the output textbox as in the below image and then release the left mouse button:
Now a whole list of attributes appear and I select Text and go for the default assertion. I could otherwise have checked something else, perhaps that the text contained sit amet foo:

Generated test code
As you can see in the Solution Explorer there are a lot of generated files - in my case I got these lovely default file names:
- CodedUITest1.cs
- UIMap.uitest
- UIMap.cs
- UIMap.Designer.cs
As with a lot of designer code it is best left untouched (as indicated by the comment Changes to this file may cause incorrect behavior and will be lost if the code is regenerated. - I tried that and indeed I broke my tests). When we refactor code we can instead alter the code in the CodedUITest1.cs. This file is big and contains a lot of auto-generated code - but the method of interest looks something like this now:
        [TestMethod]
        public void CodedUITestMethod1()
        {
            // comments from Microsoft ...
            this.UIMap.StartWPFCat();
            this.UIMap.AddText();
            this.UIMap.PressConcatenate();
            this.UIMap.AssertOutput();
            this.UIMap.ShutDownWPFCat();
        }
Keeping these methods small and giving them reasonable names are very important aspects of keeping the code reusable, maintainable and readable.
This test case now verifies one combination of input and output ("lorem ipsum dolor sit amet" + "foo bar baz" = "lorem ipsum dolor sit amet foo bar baz") - it would of course be simple to make more recordings with other combinations. But that smells like to good old fashioned anti-pattern Copy and paste programming (see [1]). We do not want to reproduce code. Another aspect of these tests is that we want interface specialists, stakeholders or other competences that are closer to the business to be able to expand these test cases. The solution to all of these problems is Data-Driven Testing!
What is Data-Driven Testing?
Data-Driven testing (see wikipedia at [2]) is, in short, a way to use a variable and expandable set of input/output combinations as opposed to a hard coded combination. This set is typically stored in some other kind of file than code - perhaps a spread sheet or a data base.
Make the test Data-Driven
The primer I read to get a start in converting my test into data-driven testing was this post at MSDN: [3].
I guess you know by now that Visual Studio is a large beast - but properly mastered it can function well. In order to make an already recorded Coded UI Test into a Data-driven Coded UI Test we need to discover some more views in Visual Studio (that I had never seen before - so I'll try to explain it properly):
- Test View - this view is opened from the Test Menu -> Windows -> Test View (and not in View -> Test View where I would have put it).
- Unit Test Properties View - In the Test View you see a list with your Coded UI Tests - right click the one you want to make Data-Driven and select Properties.
In the Unit Test Properties View we want to add the data to the soon to be data-driven test. We do so by adding a connection string.
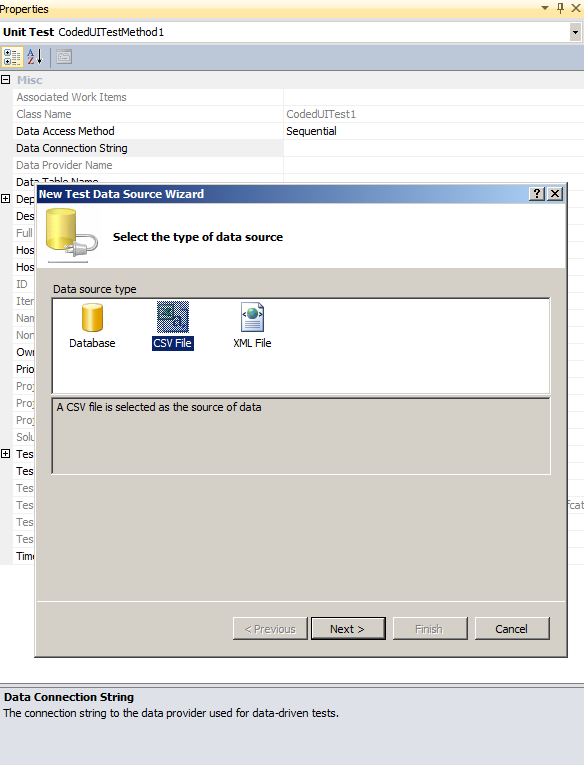
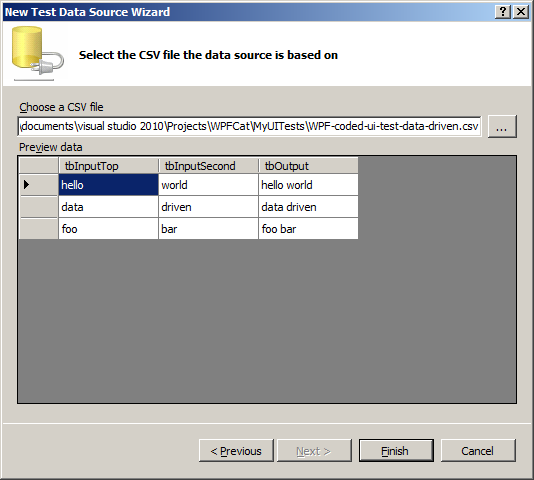
In my case I wanted the most simple solution possible - a comma separated spreadsheet (CSV-file). I experimented with semi-colon, tabs, spaces and so on until I discovered that what worked best for me was using good old fashioned quotation marks, colons and a semicolon at the end of each line. The first row is reserved for a header - you can put anything in it but I used the same name as the fields. I recommend something more user-friendly like. My CSV-file now looks something like this:
"tbInputTop", "tbInputSecond", "tbOutput";
"hello", "world", "hello world";
"data", "driven", "data driven";
"foo", "bar", "foo bar";
A good check on your data is given in the preview window:
Visual Studio will now ask if you want to copy the database file into the current project and add as a deployment item - I chose yes but to be honest I don't know the pros or cons of that.
The decorator before the test method will now change from being just [TestMethod] to something like [DeploymentItem("MyUITests\\WPF-coded-ui-test-data-driven.csv"), DataSource("Microsoft.VisualStudio.TestTools.DataSource.CSV", "|DataDirectory|\\WPF-coded-ui-test-data-driven.csv", "WPF-coded-ui-test-data-driven#csv", DataAccessMethod.Sequential), TestMethod]
Using the Data
As you will notice if you run the test will not be data-driven yet - it just runs the same test over and over (in my case three times since there were three rows in the CSV-file). Now that everything else is magic in Visual Studio this might be surprising and the refactoring is not trivial (at least not when I did it the first time).
The code we want to refactor looks something like this:
    this.UIMap.AddText();
    this.UIMap.PressConcatenate();
    this.UIMap.AssertOutput();
We can not pass the parameters as arguments in the method - you remember that this method is autogenerated and will be overwritten if you change it, right? Well I did not the first time... What you need to do is to hack the UIMap.AddTextParams and also extract the data from the CSV-file with something like this.TestContext.DataRow["tbInputTop"] - the modification will be something like:
    this.UIMap.AddTextParams.UITbInputTopEditText =
        this.TestContext.DataRow["tbInputTop"].ToString();
    this.UIMap.AddTextParams.UITbInputSecondEditText =
        this.TestContext.DataRow["tbInputSecond"].ToString();
    this.UIMap.AddText();

    this.UIMap.PressConcatenate();

    this.UIMap.AssertOutputExpectedValues.UITbOutputEditText =
        this.TestContext.DataRow["tbOutput"].ToString();
    this.UIMap.AssertOutput();
This is, in my humble opinion, really ugly code:
- it can't be read because the lines are longer than the good old 80 characters
- the parameters should be passed as variables - but I am not sure if that can be fixed.
- there are a number of files and references added to the project.
- Too many to understanding what they are good for.
- Too many to understand where to put refactoring och maintenance efforts.
- I can not be sure that the layout or references added will stay the same in the next version of visual Studio or in the next version of .NET or if the "best practices" are the same for old native windows applications, or .NET winforms, or WPF or metro/modern UI style apps.
In short I am uncomfortable writing Coded UI tests this way since there are so many unknowns. But I guess I can live with this since this is after all a pretty good way of doing it - less fragile than Sikuli for example (see wikipedia [4]).
What if a test fails?
It is not uncommon that tests fail - and Visual Studio makes reports from each test run. Embedded in this report is a screen shot of the problem when it appeared - my default screen had a zoom so you can easily verify where the problem is.
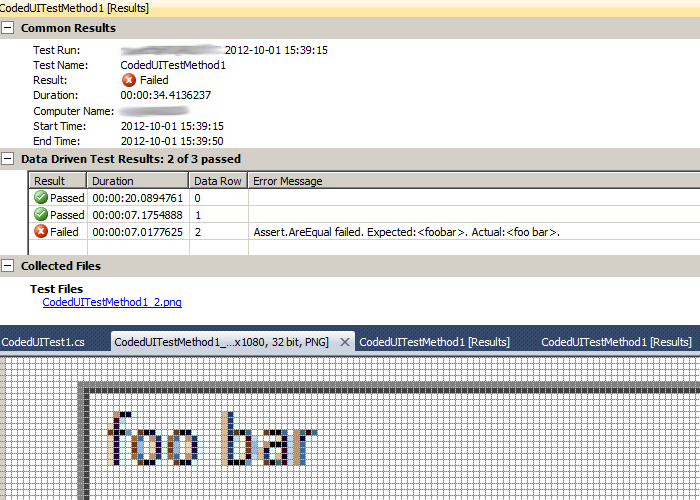
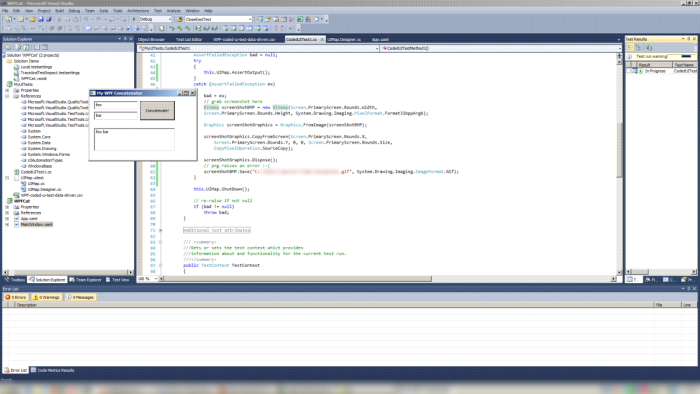
The screenshot covers the whole screen (you see Visual Studio in the backgound):
Another drawback here is that each failing test will leave an instance of the application running (the test stops since an AssertFailedException is raised).
I went a little wild and crazy and moved the assert into a try/catch block in order to always close the application. But since this will create problems with the screenshot (the screenshot is now taken after the application has finished) I added some QND-code for making an own screen shot:
    AssertFailedException bad = null;
    try
    {
        this.UIMap.AssertOutput();
    }
    catch (AssertFailedException ex)
    {
        bad = ex;

        // grab screenshot here
        Bitmap screenShotBMP = new Bitmap(Screen.PrimaryScreen.Bounds.Width,
            Screen.PrimaryScreen.Bounds.Height,
            System.Drawing.Imaging.PixelFormat.Format32bppArgb);

        Graphics screenShotGraphics = Graphics.FromImage(screenShotBMP);

        screenShotGraphics.CopyFromScreen(Screen.PrimaryScreen.Bounds.X,
            Screen.PrimaryScreen.Bounds.Y, 0, 0,
            Screen.PrimaryScreen.Bounds.Size,
            CopyPixelOperation.SourceCopy);

        // png raises an error :-(
        screenShotBMP.Save("C:\\Users\\username\\tmp\\exception.gif",
            System.Drawing.Imaging.ImageFormat.Gif);
    }

    this.UIMap.ShutDown();

    // re-raise if not null
    if (bad != null)
        throw bad;
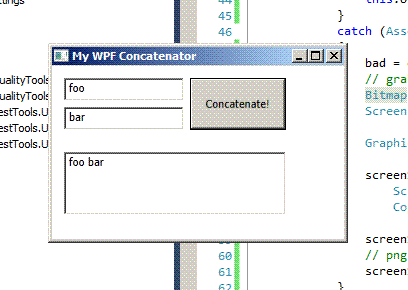
This new screen shot had a poor image quality but I guess the screen shot libraries of .NET has many parameters that could be improved. Here is a crop of it:
Summary of Coded User Interface testing in Visual Studio
I was in fact very positively surprised to discover that it was relatively simple to make coded user interface testing in Visual Studio. Simple it the sense that it was fast. But not simple in the sense that you could understand what was happening under the hood - in this regard I am still not really content.
In short we saw:
- The addition of a test project.
- The addition of unit tests in the shape of Coded UI Tests.
- In this unit test we saw actions that drove the test forward (just like in any other test) and assertions to confirm a behavior (just like in any other test).
- The main difference is that we let Visual Studio take control of our mouse and keyboard to perform these tests and that actions and assertions are recorded manually using the UIMap - Coded UI Test Builder.
The obvious positive side of this is that we can easily make UI Test - a form of Business-facing tests that support the team (Q2 of the Agile Test Quadrants - see Agila Testkvadranter for an introduction to the concept in Swedish). If we make the tests modified to support data-driven testing we can easily let out non-developer colleagues expand the tests to cover new business logic or use cases that developers might overlook, not fully understand or ignore.
One drawback is that there is a lot of things happening under the hood and that UI tests have a rumor of being fragile and hard to maintain. Renaming graphical elements or fields in the code might break the tests. Typically you need to give the elements unique names from the start (as opposed to TextBox1, TextBox2, ...) and if you don't it might be non-trivial to repair or refactor your test code - perhaps the code you need to modify is hidden under a few layer of Visual Studio views, libraries or designer code.
Read more on making Coded UI Tests Data-Driven at MSDN: [5]
See also Testing In Visual Studio.
See also Testing In Visual Studio Part 1 where we look at Static Code Analysis, Unit Testing and Code Coverage.
See also Testing In Visual Studio Part 3 where we investigate Continuous Build, Continuous Integration and Gated Check-in's.
Tillhör Kategori Test