Plone Archetypes View Template Modifications
There are at least three ways of changing the look and feel of your content types:
- Use a template and take full control of the view.
- Use a macro and take control of part of a page.
- Use a template for only a field (recommended).
In this tutorial we will try to work way through all three ways using My First Minimal Plone Content Type as the base. Also: Please note that I am using Plone 3.0 with Arcetypes version 1.5.0 - perhaps this way of modifying the appearance of a content type will change in the future (it will - trust me).
Download the different versions of this tutorial here: [1] or here [2] .
Take one: Take full control
One way of doing this in a minimal way requires the following set of files:
__init__.py
config.py
message.py
Extensions/Install.py
skins/mymessage/mymessage_view.pt
As you can see there is a folder structure and a file added. Also most files have changed compared to My First Minimal Plone Content Type.
The new file skins/mymessage/mymessage_view.pt is where all the magic is located. This is what the file looks like (perhaps you can predict what is does):
<html metal:use-macro="here/main_template/macros/master" i18n:domain="plone" >
  <body>
    <div metal:fill-slot="main" >
      <h1 tal:content="context/Title" > Title</h1>
      <font size="300%" color="#DD3333">
        <p tal:content="structure here/getBody" />
      </font>
    </div>
  </body>
</html>
The funny stuff that looks like HTML is Tag Attribute Language (TAL) and origin from the Zope layer (read more about it for Zope 2.6 here: [3]). There are two things worth noting here:
- <h1 tal:content="context/Title" > Title</h1>: This line looks into our current context (the instance of a MyMessage content type) and extracts the title.
- <p tal:content="structure here/getBody" />: This snippet also examines the current item and looks in the schema for a field called body (remember that there is an IntegerField called body). The content of this field is then inserted into <p> and </p> tags.
Looking at an instance of a mymessage would - when we are completed - look something like this:
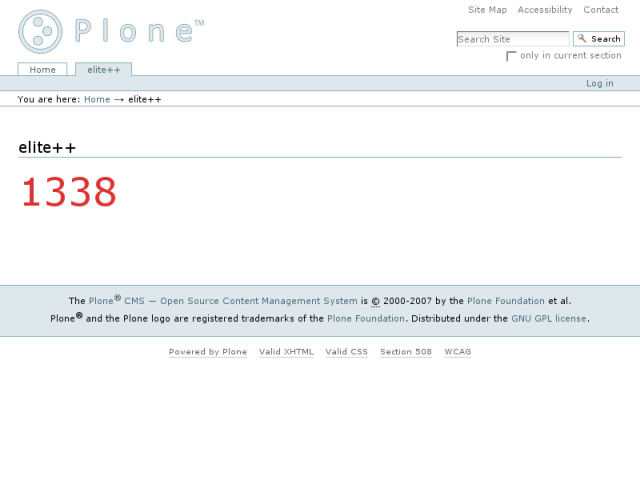
But to get there we need the template to be found and used by both Plone and Zope. Changes needed are of two types: the first type are settings needed for Zope and Plone to find the correct folder and files. The second type is for Plone to use the correct view.
Changes in config.py It seems to be considered good practice to add the name of the skins folder as a global variable in config.py, also there seems to be the need for globals to be called and stored:
PROJECTNAME = "MyMessage"
SKINS_DIR = "skins"
GLOBALS = globals()
Changes in __init__.py The init-file needs to import these new variables and register the skins-folder:
from config import PROJECTNAME, SKINS_DIR, GLOBALS
registerDirectory(SKINS_DIR, GLOBALS)
Changes in Extensions/Install.py The install-file must let Plone know of the new folder as described below:
from Products.MyMessage.config import PROJECTNAME, GLOBALS

def install(self):
     #...
     install_subskin(self, out, GLOBALS)
     print >> out, "installed subskin"
That concludes the first set of changes - we have now installed the folder and let both Plone and Zope know where to look to find the new folders.
Changes in message.py In order to force the system to use the template we have created we must build a variable called aliases. In it we define some standard behaviour and override it. We set both '(Default)' and 'view' to point to 'mymessage_view'. Some standard behaviour like editing does not have anything to fall back upon so, unfortunately, we must define the stuff already defined (like specificallt declaring that you do want the default behaviour).
class MyMessage(BaseContent):
    # ...
    aliases = {
        '(Default)'  : PROJECTNAME.lower() + '_view',
        'view'       : PROJECTNAME.lower() + '_view',
        'edit'       : 'base_edit',
        }
Please note: I am not sure why the file is called 'mymessage_view'. Sometimes I get the impression that this is default and that this view would be used thanks to some naming magic - on the other hand we specifically define it in the aliases variable. It makes no sense, but let's just do it like every one else has done...
This version can be downloaded here: [4]
Again: please note that this is probably not the way you want to do it since this is an extremely inflexible solution. Suppose you want to add fields in your content type (like in Modifying The Minimal Plone Content Type)- then every time you change it you also need to rewrite the view. Bad, bad, bad.
Take two: Change the appearance of only one field
A quite likely scenario is that you have a field that stores a certain type of data that you want to be displayed in a certain way. Often you might have a content type that contains many fields of the same type (that should thus be displayed in the same way).
Now we want a macro that displays the content of a field. For the macro we need a template. A macro-template must contain three parts:
- view macro
- edit macro
- search macro
I copy-pasted this macro template from [5] and modified it a bit. It contains a lot of bulk but I am afraid of removing stuff from it - I am afraid to break it. It imports lot of xml name spaces that we might need.
We can see the three view/edit/search parts. In the edit and search parts I fall back upon the default methods - and again we explicitly have to say that we want the default.
    <html xmlns="[6];
          xmlns:tal="[7];
          xmlns:metal="[8];
          xmlns:i18n="[9];
          i18n:domain="plone">
      <head><title></title></head>
      <body>

        <!-- view -->
        <metal:view_macro define-macro="view" tal:replace="structure
              python:str('%d is my favourite number' % accessor())" />

        <!-- edit -->
        <metal:define define-macro="edit">
          <div metal:use-macro="here/widgets/integer/macros/edit"></div>
        </metal:define>

        <!-- search -->
        <metal:define define-macro="search">
          <div metal:use-macro="here/widgets/integer/macros/edit"></div>
        </metal:define>

      </body>
    </html>
I stored this in skins/mymessage/my_string_widget.pt and as I am sure you understand we need to register the skins folder just like in the above example.
But to use this macro instead of the default one we of course have to do something to make changes take effect. The secret is is the content type schema definition, we change it to something like this:
    IntegerField(widget=StringWidget(macro='my_string_widget',),
                 ...,
                ),
As you can see we use an already defined widget, but override the default macro.
Let us also update the schema to be able to compare what happens without this change, the schema is now:
# Schema definition
schema = BaseSchema.copy() + Schema((

    IntegerField('alpha',
                required = 1,
                widget=StringWidget(macro='my_string_widget',),
              ),

    IntegerField('bravo',
                required = 1,
                widget=StringWidget(macro='my_string_widget',),
              ),

    IntegerField('charlie',
                required = 1,
              ),
    ))
Saving this, restarting the server and reinstalling the MyMessage package should now result in something like this:
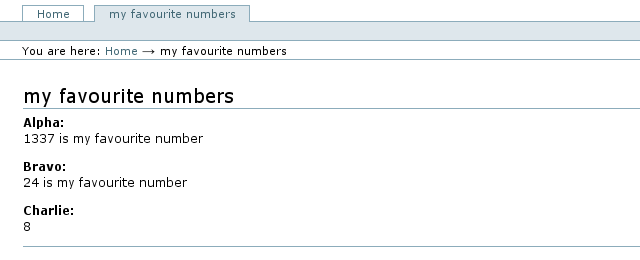
As you can see the two first fields have identical behavior when it comes to their appearance. The third field looks like the old default field. You can download this version of my message right here: [10] .
Take Three: Change everything
By following the tutorial in [11] I created the file /skins/mymessage/mymessage_view.pt that contains:
    <html xmlns="[12];
          xmlns:tal="[13];
          xmlns:metal="[14];
          xmlns:i18n="[15];
          i18n:domain="plone">
      <head><title></title></head>
      <body>
        <metal:header_macro define-macro="header">
          Foo1
        </metal:header_macro>
        <metal:body_macro define-macro="body">
          Foo2
        </metal:body_macro>
        <metal:footer_macro define-macro="footer">
          Foo3
        </metal:footer_macro>
        <metal:folderlisting_macro define-macro="folderlisting">
          Foo4
        </metal:folderlisting_macro>
      </body>
    </html>
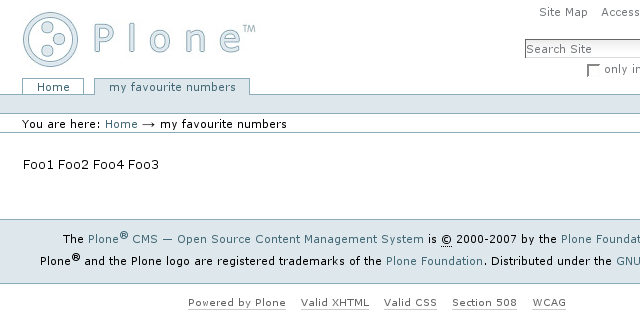
As you can see it contains metal-parts for header, body, footer and folderlisting. These decide how certain parts of the page are displayed. You can also js and css to change that aspects of a the view of a content type.
The above template produces the following quite blank and annoying look:
A second look at the template: the header
Let us start by changing one piece of the macro - the header. First you need a file with a magic name in a folder that has been registered as seen above. In this case ./skins/mymessage/mymessage_view.pt will do just fine. As you will see the template is pretty much standard html. As such it can be seen in borwsers, previewed and so on - your viewer will just ignore the strange code and if you are lucky leave it alone.
<html xmlns="[16];
      xmlns:tal="[17];
      xmlns:metal="[18];
      xmlns:i18n="[19];
      i18n:domain="plone"
      >
  <head><title>Custom view of MyMessage.</title></head>
  <body>

    <metal:header_macro metal:define-macro="header">
    <h1>
      MyMessage: <span tal:content="context/title">title</span>
    </h1>
    </metal:header_macro>

  </body>
</html>
As you can see from the code the interesting parts here start with <metal:header_macro metal:define-macro="header">. This command tells Zope that we want to override the default macro for the header with our own. And for the first time (almost) in my tutorials about Plone and Archetypes Conventions wins over Configuration - that means that if you do not specify what you want you get the default settings. In this case (and most others I would assume) this is exactly what we want.
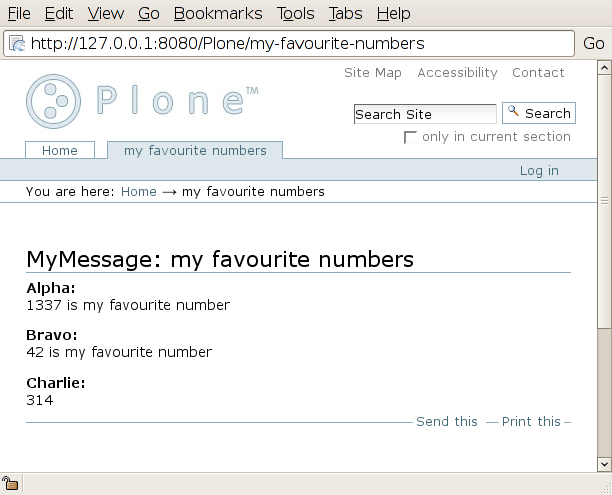
So what is going on in the metal-tags? We specify a h1-header (the main header of a page) and then a little cryptic something: MyMessage: <span tal:content="context/title">title</span>. This means that we always get the text "MyMessage:" but it is followed with tal:content="context/title. This is one way of telling the platform that you want to extract the title of your content type.
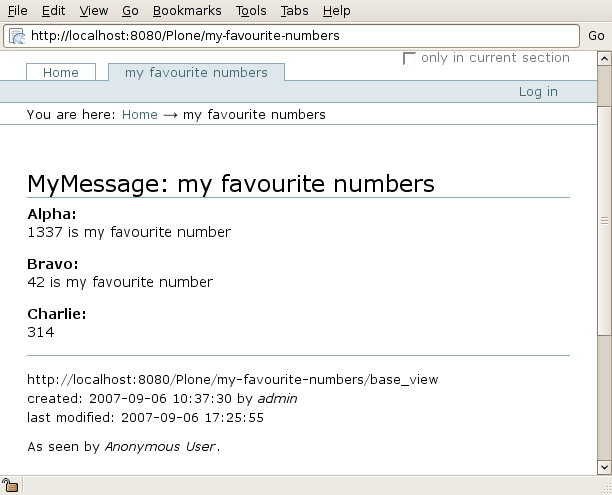
On this screenshot of this template in action you can see that the title is indeed replaced with the corny text MyMessage: my favourite numbers. The rest of the page is left alone.
Extracting the URL and the username: let us change the footer
If we now want to add a little somthing at the bottom of the page we have to modify our template to contain a metal tag that defines the macro footer: metal:define-macro="footer". In this we might want to add the url of the page and its creation and mofication dates. Also we want to add every webdesigners worst nightmare: a horizontal line [:)]-|--<.
    <metal:footer_macro metal:define-macro="footer">
      <hr>
      <small>
        <p>
          <code tal:replace="request/URL">URL</code><br />
          created: <span tal:replace="context/CreationDate" /> by
          <i><span tal:replace="context/Creator" /></i><br />
          last modified: <span tal:replace="context/ModificationDate" />
        </p>

        <p>As seen by <i tal:content="user/getUserName">John Doe</i>.</p>

      </small>
    </metal:footer_macro>
As you will see in the screenshot the page now contains the URL, creation and modification date, creator and the name of the user that currently views the page.
The tricky parts: Modifying the body
I want to show a very nice feature of this approach - calling a method of a class and displaying the result in the browser. First let us write a simple function, in this case I just want to compute the sum of the fields alpha, bravo and charlie. I update the MyMessage class like this:
class MyMessage(BaseContent):
    # ...

    def my_sum(self):
        return self.alpha + self.bravo + self.charlie
I will now walk you through the parts of the template and explain each part:
Defining the body macro
    <metal:body_macro metal:define-macro="body">
      <h3>Summary</h3>
Like the earlier cases we start with a metal:define-macro call. This way we override the default behavior.
Calling the method
      <p>
        The sum of <i tal:content="context/title">message</i>
        is <span tal:content="context/my_sum"> ***</span>.
      </p>
In this snippet we see how we can extract the value of a member of our class: """<i tal:content="context/title">message</i>""". In the exact same way we call a method (or function) of our class: """<span tal:content="context/my_sum"> ***</span>""".
Accessing accessors and using Python
As you might have guessed we access our fields in the schema in a similar way as well, by a syntax like this: """<span tal:content="context/alpha">alpha</span>""".
      <p>
        That is true since
        <span tal:content="context/alpha">alpha</span> +
        <span tal:content="context/bravo">bravo</span> +
        <span tal:content="context/charlie">charlie</span> =
A nice and interesting option, that should be used with care, is to make a Python call on the fly:
        <span tal:content="python:
          context.getAlpha() + context.getBravo() + context.getCharlie()">
          sum</span>
      </p>
Looping over the fields
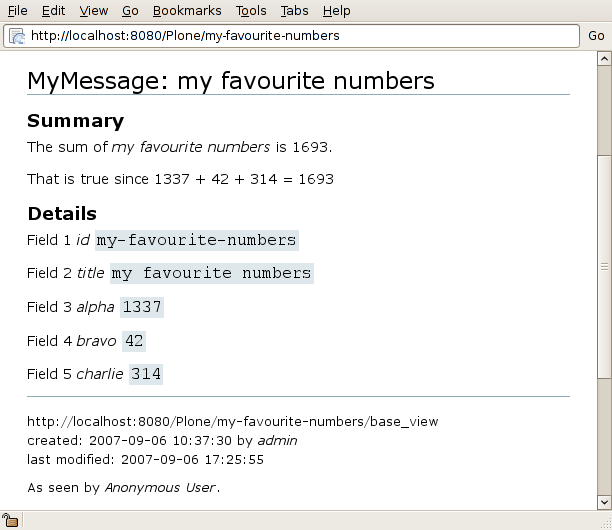
Using the metal and tal tags you can even iterate over for example the fields in a schema. This requires a little extra knowledge and some dirty tricks such as if-conditions. The """<metal tal:repeat="field python:here.Schema().filterFields(isMetadata=0)">""" declares that we are repeating something. Inside this loop a variable with the name field is used. Also we iterate over the items in "here.Schema().filterFields(isMetadata=0)" that means that we ignore fields that are considered metadata.
Also we ignore fields that are invisible with the "<tal:if_visible>" tag.
      <h3>Details</h3>

      <metal tal:repeat="field python:here.Schema().filterFields(isMetadata=0)">

        <tal:if_visible>

          <p>
            Field <span tal:content="repeat/field/number">#</span>
            <i>
              <span tal:content="field/getName">Fieldname</span>
            </i>
            <code>
              <span tal:content="python:field.getAccessor(context)()">1</span>
            </code>
          </p>

        </tal:if_visible>
      </metal>
    </metal:body_macro>
Now if everything works out correctly you should be looking at something like this:
Download it here: [20]
Some additional remarks
As a fanatic fan of the KISS-principle (Keep It Simple Stupid) I would recommend using as few and as generic changes as possible to any view of a schema. It is often just silly extra work. Also I would prefer using changes on a field level by using a custom macro on a field, like this:
    IntegerField(widget=StringWidget(macro='my_string_widget',),
                 ...,
                ),
If this is not acceptable due to some graphical design aspect I would, as option two, prefer to modify part of the main view macro. Using something like this:
    <metal:body_macro metal:define-macro="body">
      <!-- contents goes here -->
    </metal:body_macro>
Also in this body macro I would prefer a generic approach before a static approach. Imagine your boss telling you that you have to add a field to the schema. You can not tell him "No, because then I have to rewrite my view templare.", but if you would your boss would have told you that you should have thought about that from the beginning and then offer you free pizza for late nights at the office until you are done.
A small example to illustrate a generic approach
Let's add an extra field to our schema. Can you guess what I want to call it? Delta of course. The schema would get the following modification:
schema = BaseSchema.copy() + Schema((
    # ...
    IntegerField('delta',
                required = 1,
              ),
    ))
Also we update the function inside the class - we still would only have touched one file:
    def my_sum(self):
        return self.alpha + self.bravo + self.charlie + self.delta
Looking at a new instance of our MyMessage content type would now present something like this in your browser:
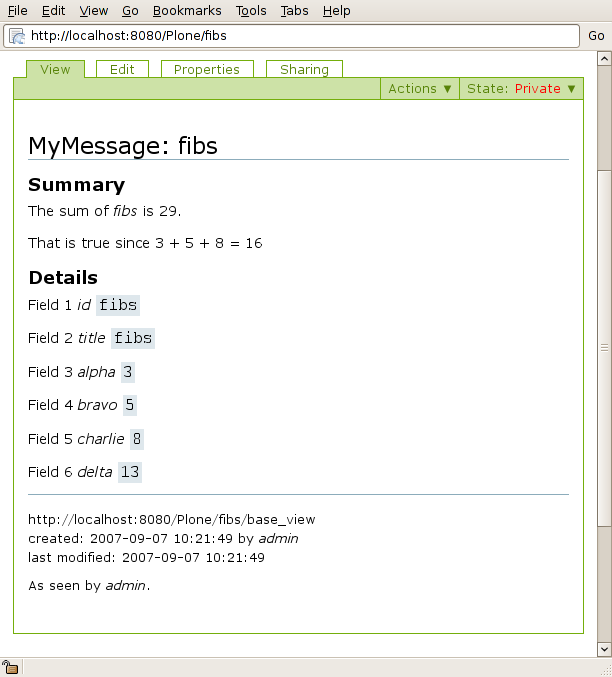
As you can see: the loop needs no change - it is ok already. The upper part where we specifically used getAlpha, getBravo and so on needs a review. Perhaps we have little time and patience and do not notice this error - then your content type is now broken.
References
Here are two nice places to start:
- Customizing AT View Templates by Floyd May [21]
- How to customise view or edit on archetypes content items by Peter Simmons [22]
- Programming Plone by Raphael Ritz [23]
This page belongs in Kategori Programmering.
This page is part of a series of tutorials on Plone Cms.